


These Valentine’s Day Oreo Pops are perfect for kids’ parties and adult events alike. They are easy to make and look so elegant, and only a few ingredients are needed to make these eye catching treats any time of the year.
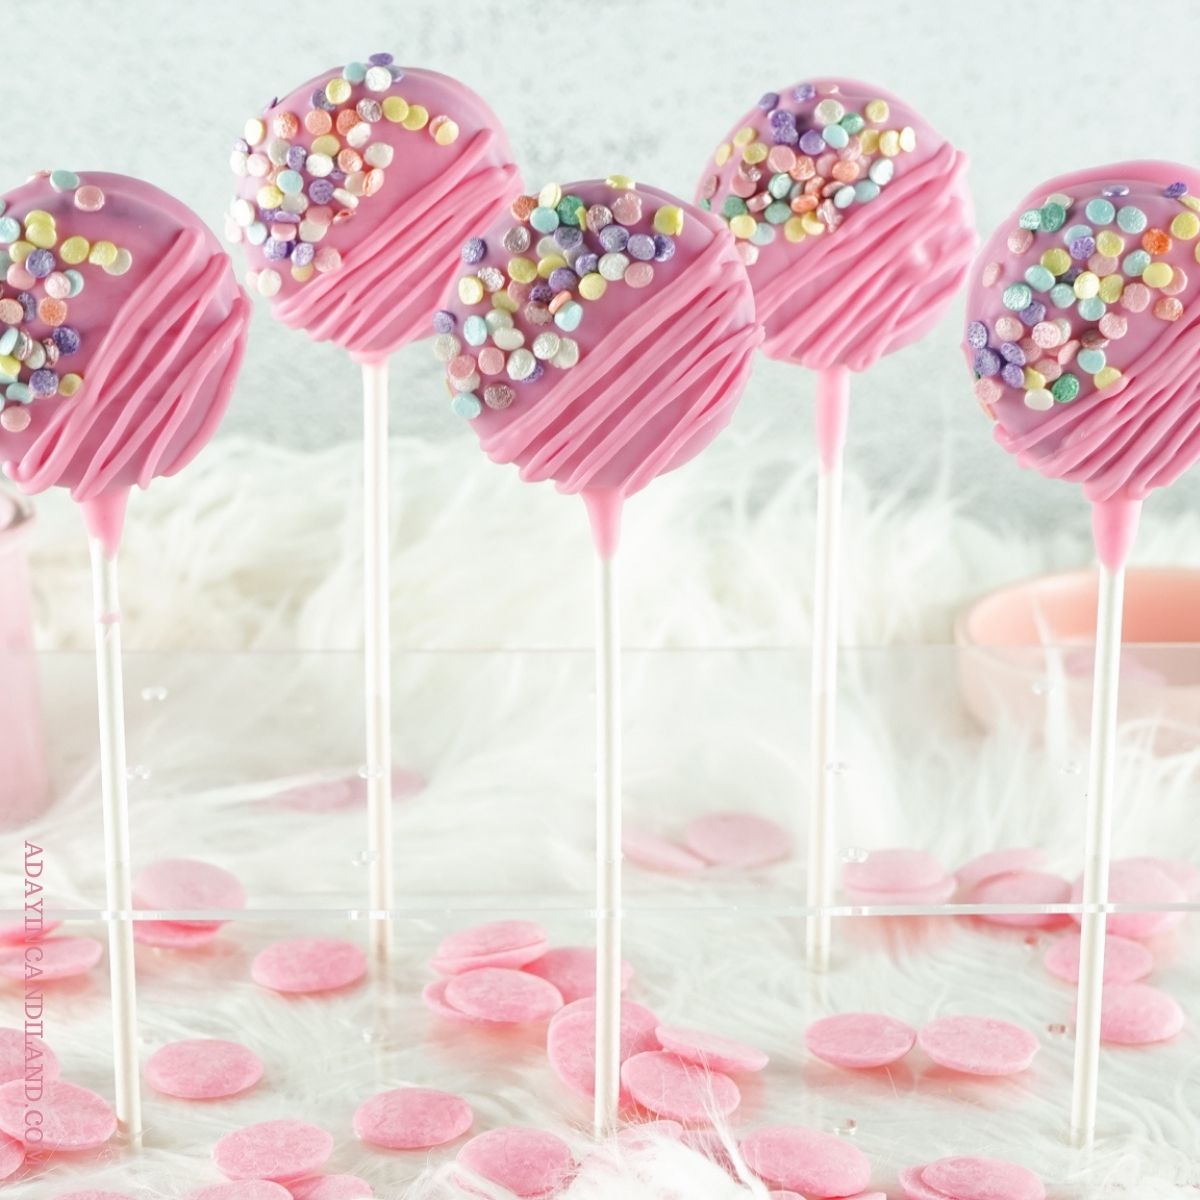
When you need a fancy treat to make an impression, these go to Oreo pops fit the bill. They not only taste amazing, I mean they are Oreos, but they look so darn pretty. You can’t go wrong with this recipe, and you can change up the colors and sprinkles for any occasion.
They sit beautifully on a party tray next to my Valentine’s Day mini brownie bites and Valentine’s Day sugar cookies.
Quick Look
- 🕒 Prep Time: 20 minutes
- 🌡️ Cook Time: 3 minutes in the microwave
- ⏳ Total Time: 35 minutes including drying
- 🍽️ Serving: 12 pops
- ⚡ Calories: 128kcal per pop
- 🌶️ Flavor Profile: Chocolate Oreo under a sweet candy shell with confetti sprinkles
- ✋ Difficulty: Easy, and the sprinkle step is the only race against the clock
Quick Answer
Line a baking sheet with parchment paper and twist apart 12 Oreos. Melt the pink candy melts in the microwave, 3 minutes on high pausing every minute to stir, then stir in a tablespoon of coconut oil until smooth. Dip a stick in the melted candy, press it halfway up the middle of an Oreo, and cap it with the top cookie. Pour the candy into a tall glass, dip each pop, sprinkle the wet left diagonal immediately, then pipe thin straps across the lower right with the leftover candy in a frosting bag. Let them sit about 10 minutes, until hardened.
Jump to:
Why This Recipe Works
Click to see the technique science
- The filling is the anchor. Pressing the dipped stick into the creme and capping it back glues the stick in as the candy sets; skip the dip and the cookie spins off the stick.
- Coconut oil thins the candy melts to a dipping consistency that coats in one pass. Too thick and the dark cookie shows through; too thin and it will not cover pink over black.
- Stir every minute in the microwave. Candy melts scorch quietly; pausing to stir melts them evenly without ever overheating.
- A tall glass beats a bowl for dipping. Deep and narrow means one straight plunge covers the whole pop without spooning and swirling.
- Sprinkles go on wet, immediately. These dry fast, and sprinkles only stick while the shell is glossy. Work one pop at a time.
- The straps go on after the shell sets, so the piped lines sit crisp on top instead of bleeding into the base coat.
- Air drying beats the fridge. Chilling condenses moisture on the shell, which ruins further decorating and dulls the finish.
Why You’ll Love This Recipe
- Four ingredients, no baking. The microwave is the only appliance.
- They look store bought fancy. The diagonal sprinkles and piped straps read as a candy shop finish.
- Kids can help. Twisting Oreos and throwing sprinkles is exactly their skill set.
- Any occasion, one recipe. Change the candy melt color and sprinkles and these work all year.
- They keep. Made a few days ahead, they hold their look for the party.
- A centerpiece for a Galentine’s tea party next to tea party cookies and tea bombs.
Key Ingredients
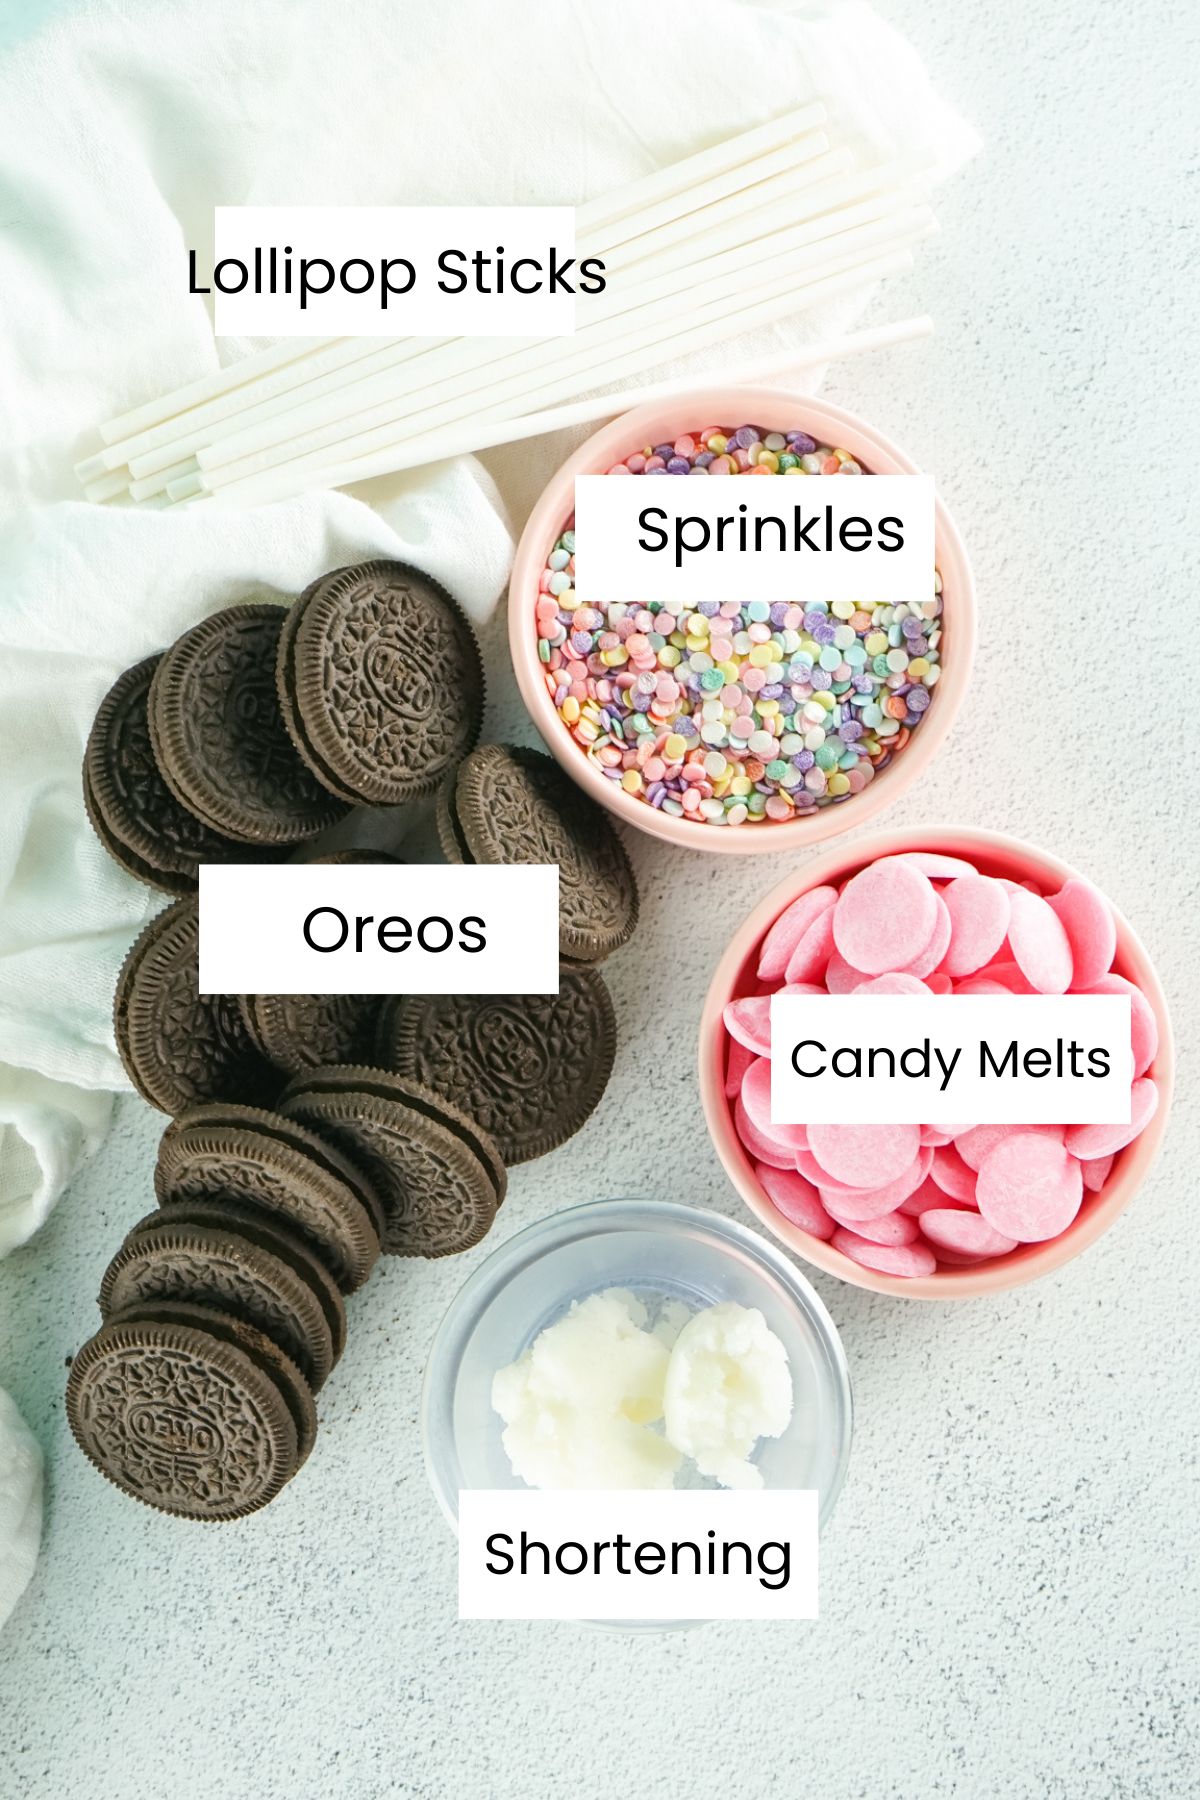
Four ingredients plus the sticks. Quantities are in the recipe card below.
- Oreo Cookies. Twelve regular Oreos. Any flavor works; the creme filling is what holds the stick.
- Pink Candy Melts. The pink shell. One 12 ounce bag covers a dozen pops.
- Coconut Oil. One tablespoon thins the melted candy to a smooth dipping consistency; shortening works the same way.
- Sprinkles. A pastel confetti mix for the diagonal.
- 6″ Candy Sticks to build them on, and Amazon for Cake Balls or Oreo Pops for the pops to stand in style.
- You will also need parchment paper, a tall glass, a Frosting Bags and scissors.
See the recipe card below for exact quantities and full instructions.
Variations & Substitutions
- Different Oreo flavors. Golden, mint or seasonal Oreos all work under the shell.
- Any candy melt color. Red and white for Christmas, orange and purple for Halloween, pastels for Easter, school colors for a graduation.
- Change the sprinkles to match: hearts, confetti, nonpareils or sanding sugar.
- Different piping designs. Swap the diagonal straps for zigzags, dots or a second color in a separate bag.
- White chocolate instead of candy melts works with a teaspoon more coconut oil, though candy melts set harder and faster.
- Round out a holiday cookie tray with my Christmas snowball cookies, peppermint cheesecakes or Valentine cake cookies in the same colors.
How to Make Oreo Pops
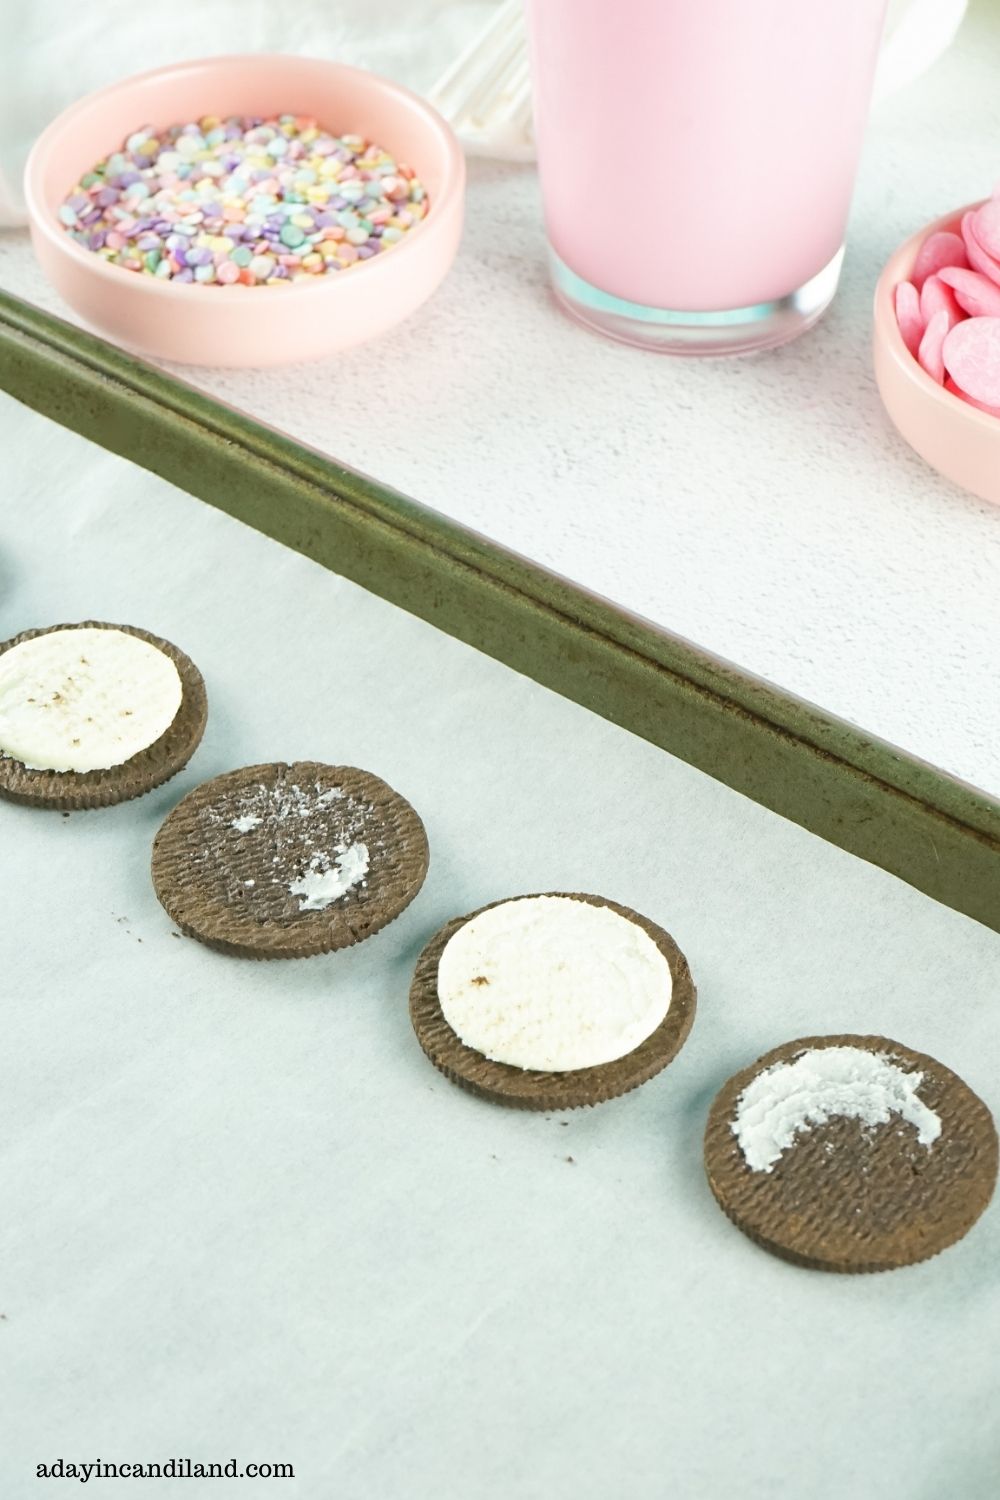
- Line a baking sheet with parchment paper and twist apart your Oreos. Line them up on the pan.
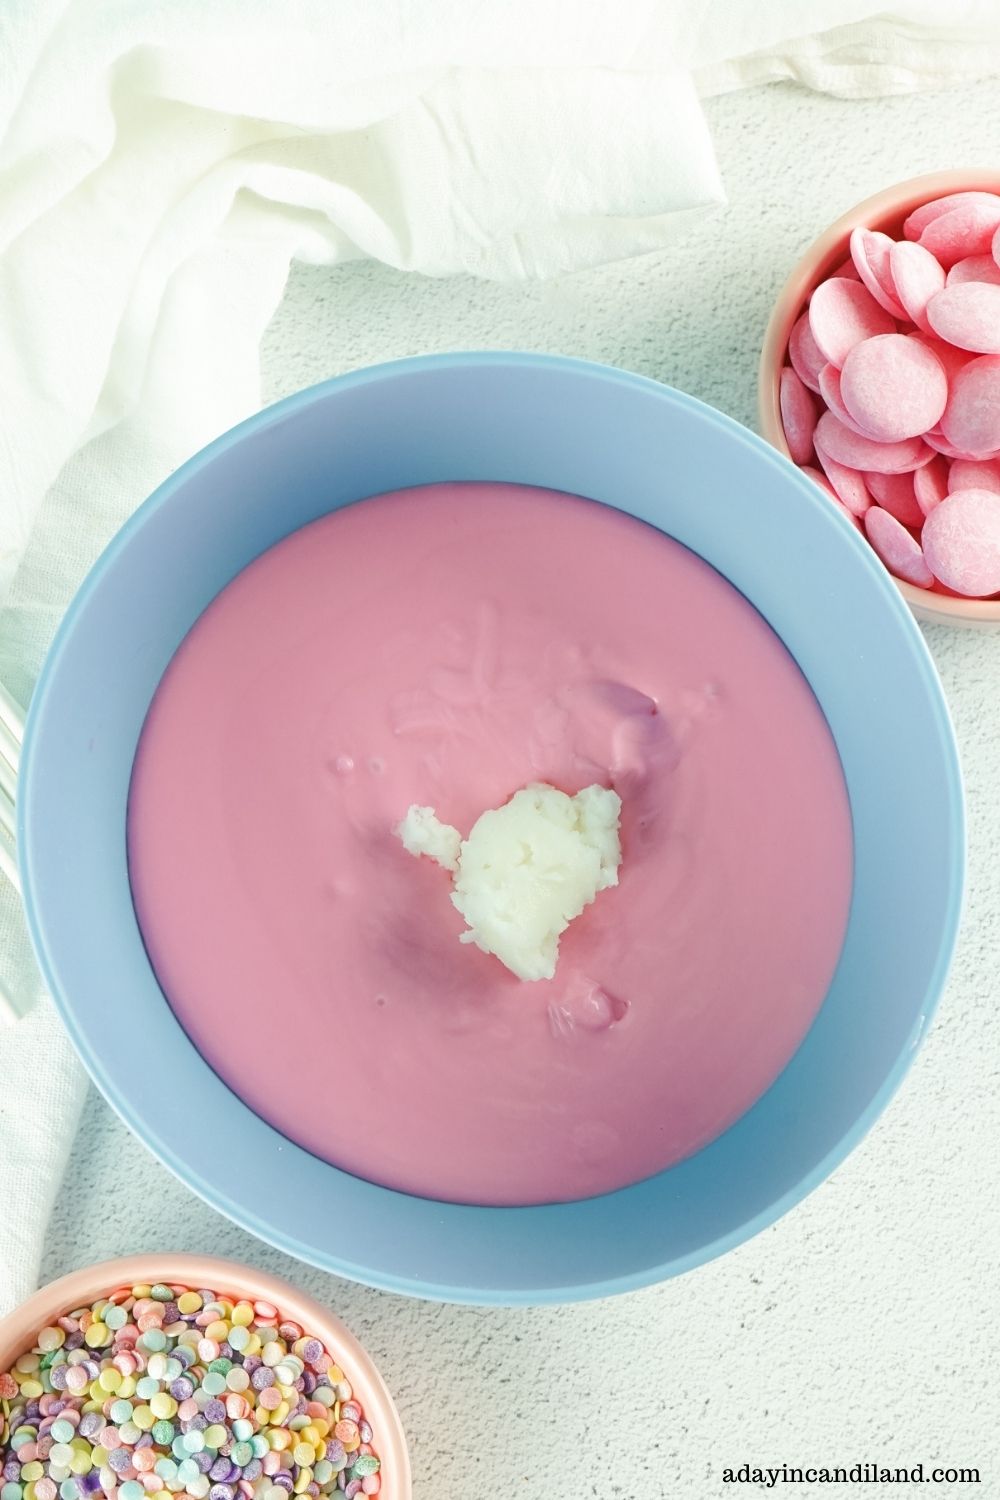
- Place the candy melts in a microwave safe bowl and cook on high for 3 minutes, pausing every minute to stir. Once melted, add the coconut oil and stir until smooth.
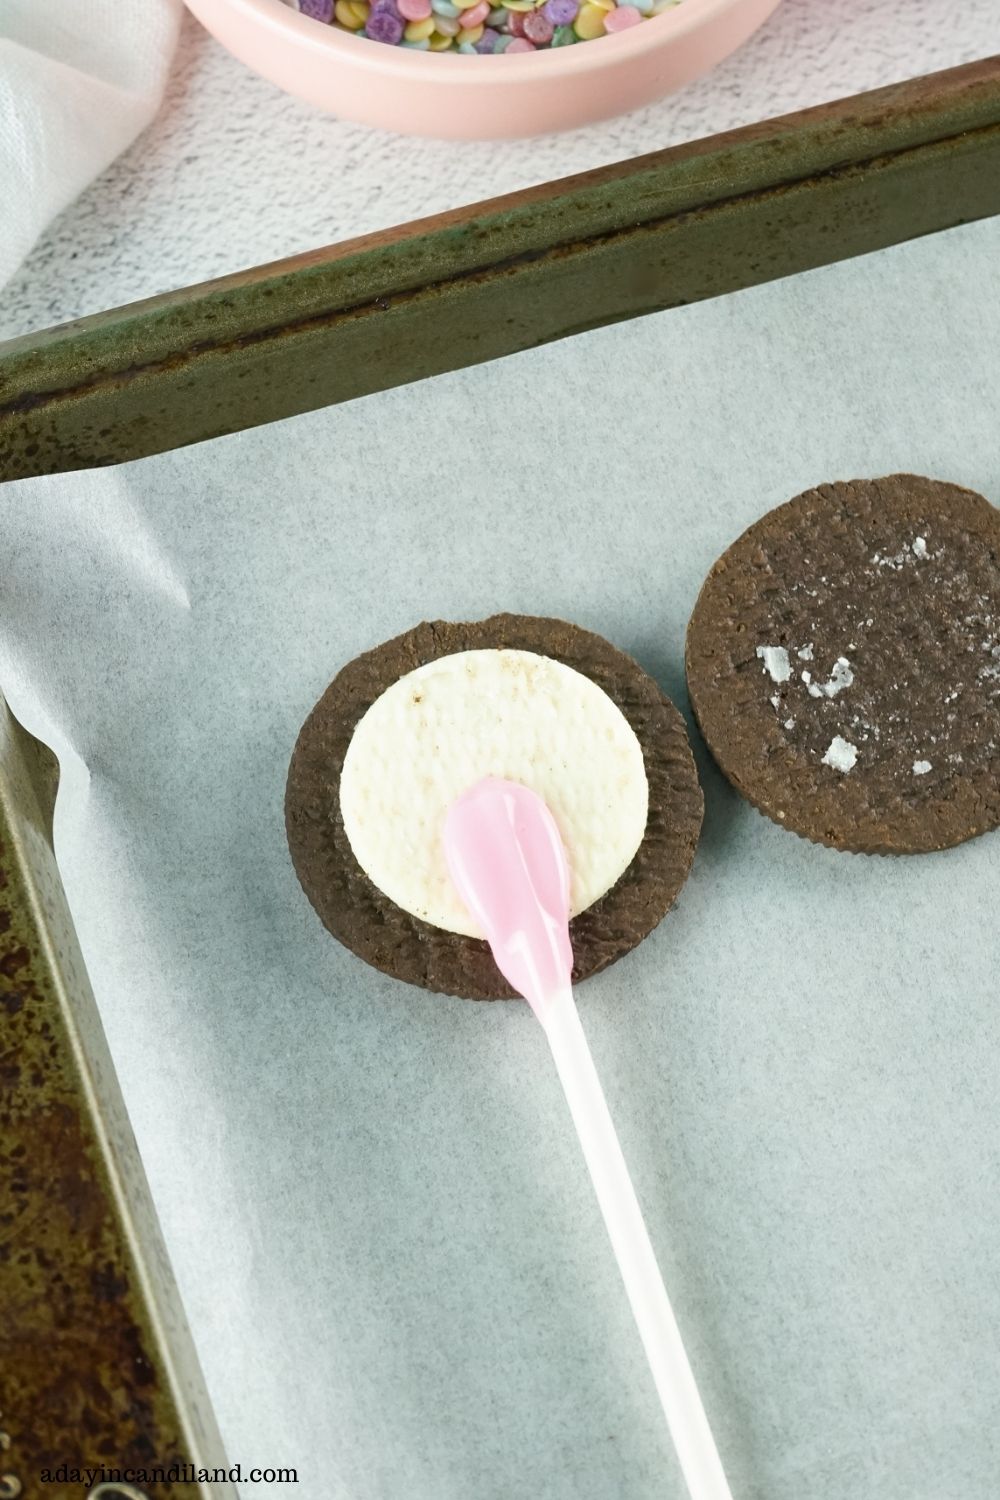
- Dip your sucker sticks into the chocolate and place them about halfway up the middle of the Oreo, then place the top of the Oreo back on the cookie, pushing down gently to press the stick into the filling.
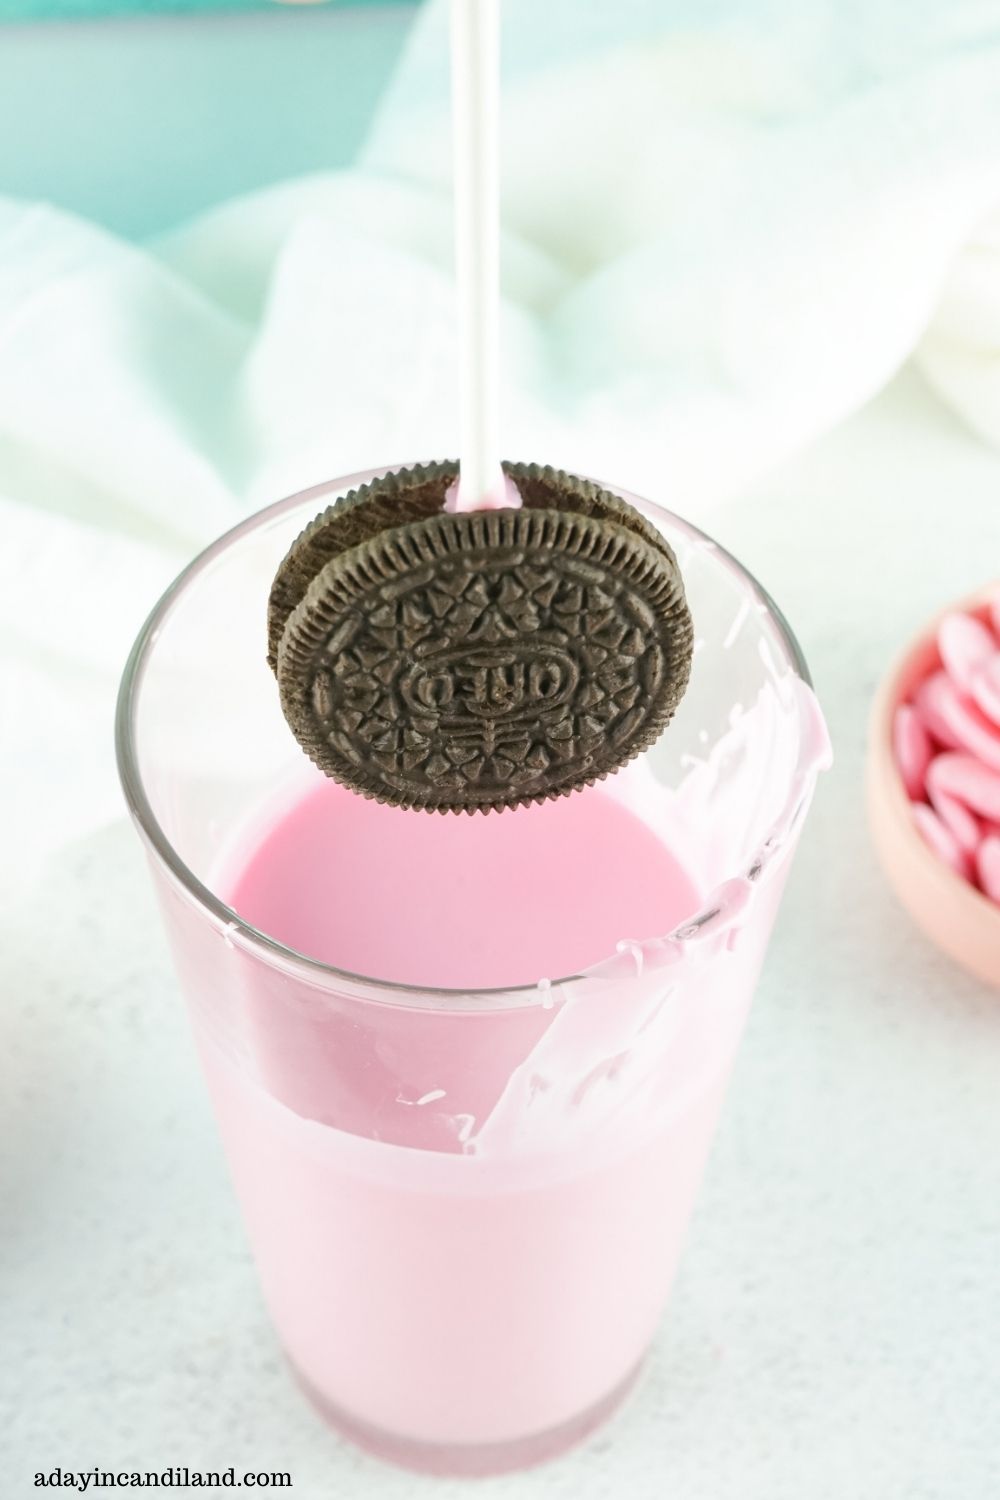
- Pour the chocolate into a taller cup that’s wide enough to fit an Oreo comfortably, dip each pop, and let it drip. Allow them to dry for a few minutes.
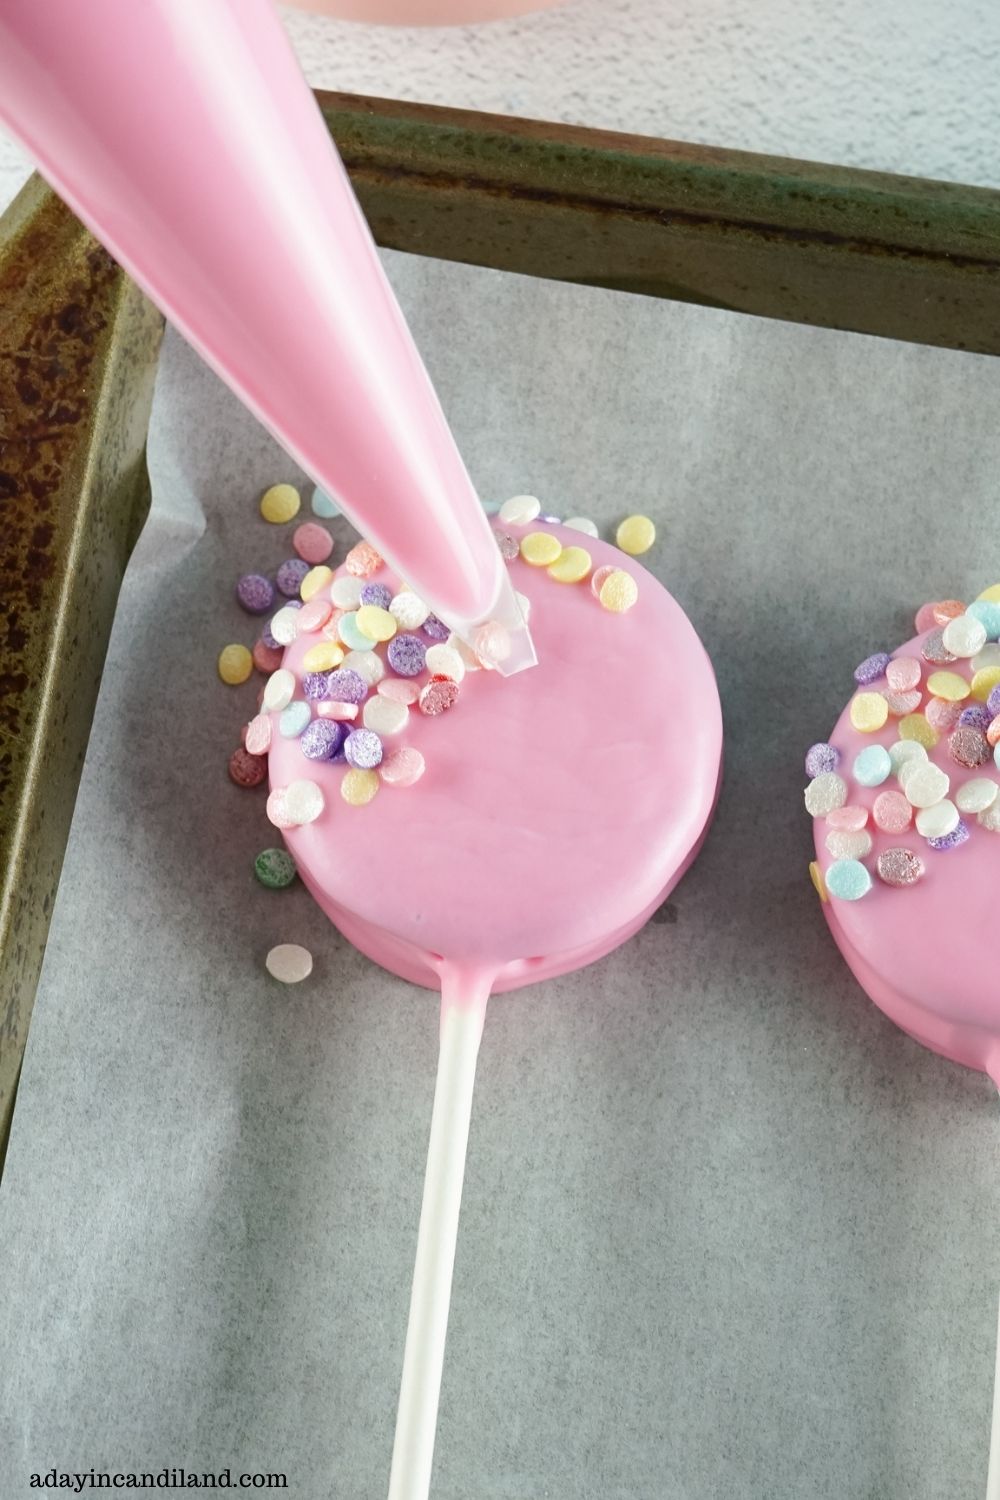
- Place the pop back on the baking sheet and immediately sprinkle the left diagonal portion with sprinkles. Then place the remaining chocolate in your frosting bag, snip a very small tip, and pipe diagonal straps on the lower right, in line with the sprinkles. Do not cover the sprinkles.

- Repeat with all the pops and let them sit for around 10 minutes, or until hardened. Enjoy!
Recipe Tips & Tricks
- Watch how crazy you get with the sprinkles. They fly over and stick to the other pops while they are still wet, leaving you with spotty pops.
- Don’t make your chocolate too thin. This is pink chocolate going on a very dark Oreo; you want it to cover well. If it seems too thick and too much is sticking, add a bit more coconut oil and heat a few more seconds.
- Work fast on the sprinkles. These dry quickly, so don’t take too long or they won’t stick.
- For a rounded back, stand the pops in a sucker stand or styrofoam to dry instead of laying them flat.
- Skip the fridge and freezer for drying. The condensation makes further decorating harder and the finish less pretty. They do keep well chilled once fully decorated.
- Snip the piping tip tiny. You can always cut more; thin straps are what make them look professional.
Serving Ideas & Suggestions
Stand them upright in a pop stand or a styrofoam block wrapped in tissue for a bouquet effect, or lay them on a platter in alternating directions. For gifting, slide each one into a clear treat bag tied with ribbon; they travel to classroom parties beautifully.
On a dessert table they play well with a Milky Way poke cake, Rolo pretzel cookies, matcha green tea cookies, lemon poppy seed cookies or carrot cake mix cookies, and in fall colors they can even join the caramel pumpkin cookies. The rest of my cookie recipes and dessert recipes can fill the tray.

Oreo Pops FAQs
Be careful putting these in the fridge or freezer to dry faster; that causes condensation, which makes further decorating harder and the finish less pretty. Fully decorated pops do keep well in the fridge and freezer outside of that one issue.
You can try double stuffed Oreos; the extra creme should grip the stick even better, though regular Oreos are the tested version. Any flavor of Oreo works as well.
Don’t make the chocolate too thin, since pink candy has to cover a very dark cookie in one coat. If it is so thick it globs on, add a little more coconut oil and heat a few seconds until it flows smoothly off a spoon.
You can buy stands made for cake pops and Oreo pops, or push the sticks into a styrofoam block and make your own. Standing them while they dry also keeps the backs rounded instead of flat.
Two to three days ahead is comfortable. Once the shells are fully set, store them in an airtight container at cool room temperature in single layers separated by parchment.
Clumping means the melts overheated or caught a drop of water; melt in short bursts, stir every minute, and keep bowls bone dry. Cracking comes from a cold cookie or a fridge dry; let everything work at room temperature.
Read Here For More Valentine’s Day Ideas and Recipes


Valentine’s Day Oreo Pops
Equipment
- Parchement Paper
- Baking Sheet
- Sucker Sticks
- Frosting Bag
- Scissors
- Small Cup or Dipping Dish
Ingredients
- 12 Regular Oreos
- 12 oz Pink Candy Melts
- 1 Tablespoon Coconut Oil
- Pastel Confetti Sprinkle Mix
Instructions
- Line a baking sheet with parchment paper and twist apart your Oreos. Line them up on the pan.
- Place the candy melts in a microwave-safe bowl and cook on high for 3 minutes, pausing every minute to stir until combined. Once the candy is melted add the coconut oil and stir until smooth.
- Dip your sucker sticks into the chocolate and place them about halfway up the middle of the Oreo and place the top of the Oreo back on the cookie, pushing down gently to press the stick into the Oreo filling.
- Allow them to sit for a few minutes to dry.
- Pour chocolate into a taller cup that's wide enough to fit an Oreo comfortably.
- Place the Oreo back on the baking sheet and immediately sprinkle the left diagonal portion of the pop with the sprinkles
- Repeat with all Pops.
- Place the remaining chocolate in your frosting bag and use scissors to cut off a very small tip of the bag.
- Make diagonal straps of the lower right portion of the Oreo, in line with the spirinkles. Do not cover the sprinkles.
- Allow the Oreos to sit for around 10 minutes or until hardened. Enjoy!
